Your easy guide through the basics of wireframe annotations…
When designing a website, product, or anything else that needs to look good and be user-friendly, you’ll undoubtedly need to create wireframes.
Wireframes are an important part of the design process. They help you visualize the design’s look and function before you build it.
A wireframe is a basic, skeletal version of your design that shows your content’s layout and how it will work. Wireframing is essential in the design process, but it can be challenging to communicate your ideas effectively to others.
That’s where annotations come in. Annotations are notes that you add to your wireframes to help explain your design decisions. By adding annotations to your wireframes, you can communicate your ideas more clearly and get feedback on your designs earlier in the process.
This blog post will teach you everything about wireframe annotations, why they’re important, and how to create them in just a few steps.
How do you explain the wireframe?
A wireframe is a simplified representation of the future design that shows the basic elements of the page. These elements are not interactive and do not show too much detail, so the question is, why use a wireframe at all?
Using a wireframe, you create a simple structure and display the functionality that the future site offers, and as such, it is easy to change it according to the clients’ needs and requirements.
It is important to emphasize that the wireframe should not define the final layout pages that already show how the site will work.
How to take wireframes to the next level?
One way to do this is by using annotations. Annotations are little notes and symbols that help explain your wireframe and clarify your design intentions. They can show how users should interact with your design, highlight key areas, or simply remind you of your design decision.
What are wireframe annotations?

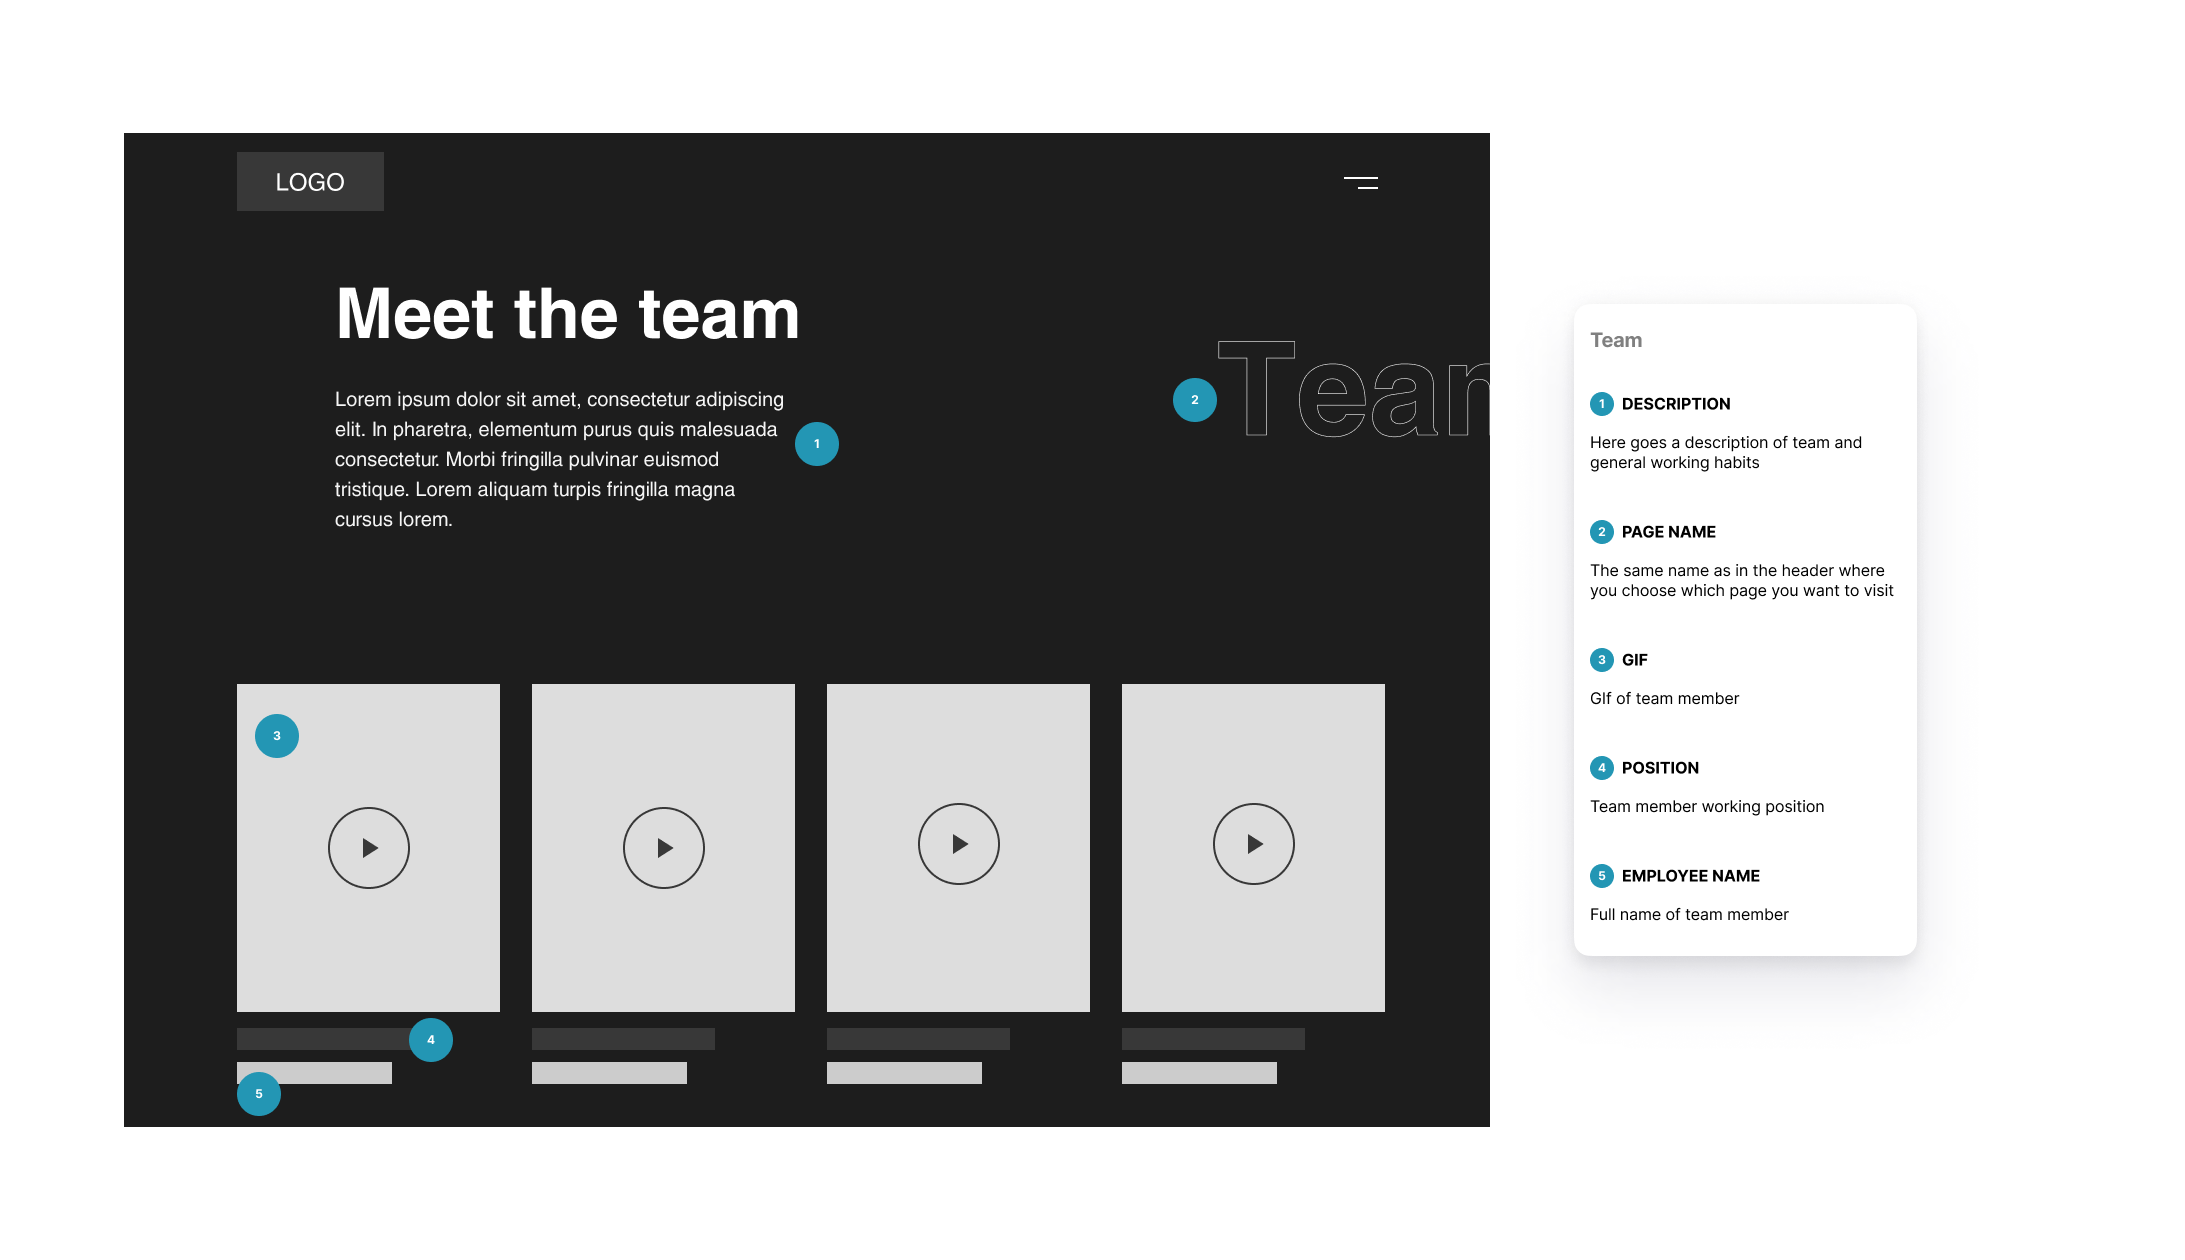
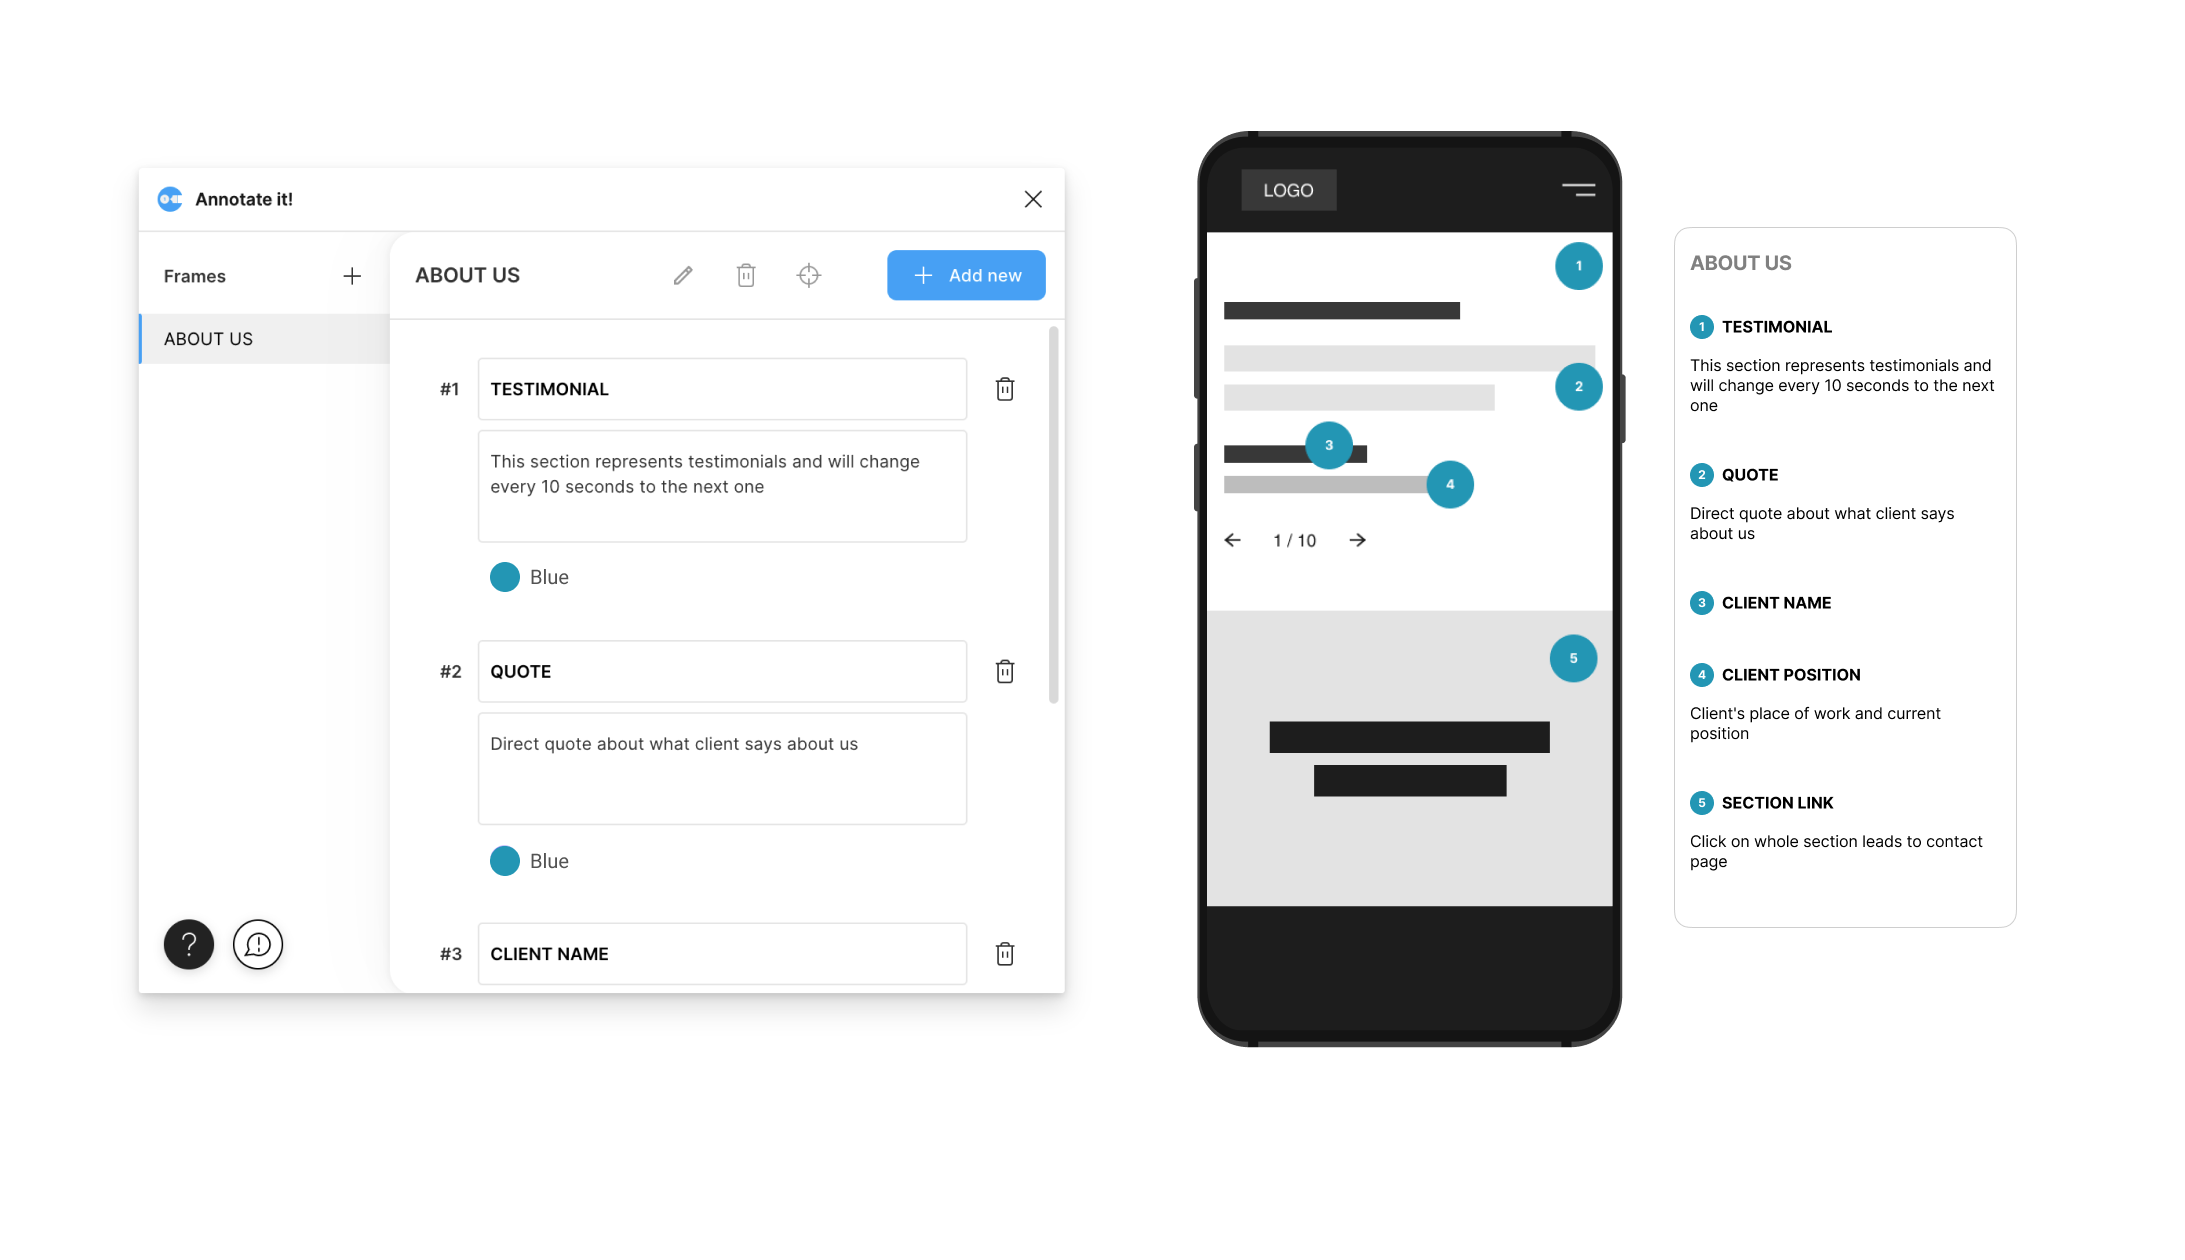
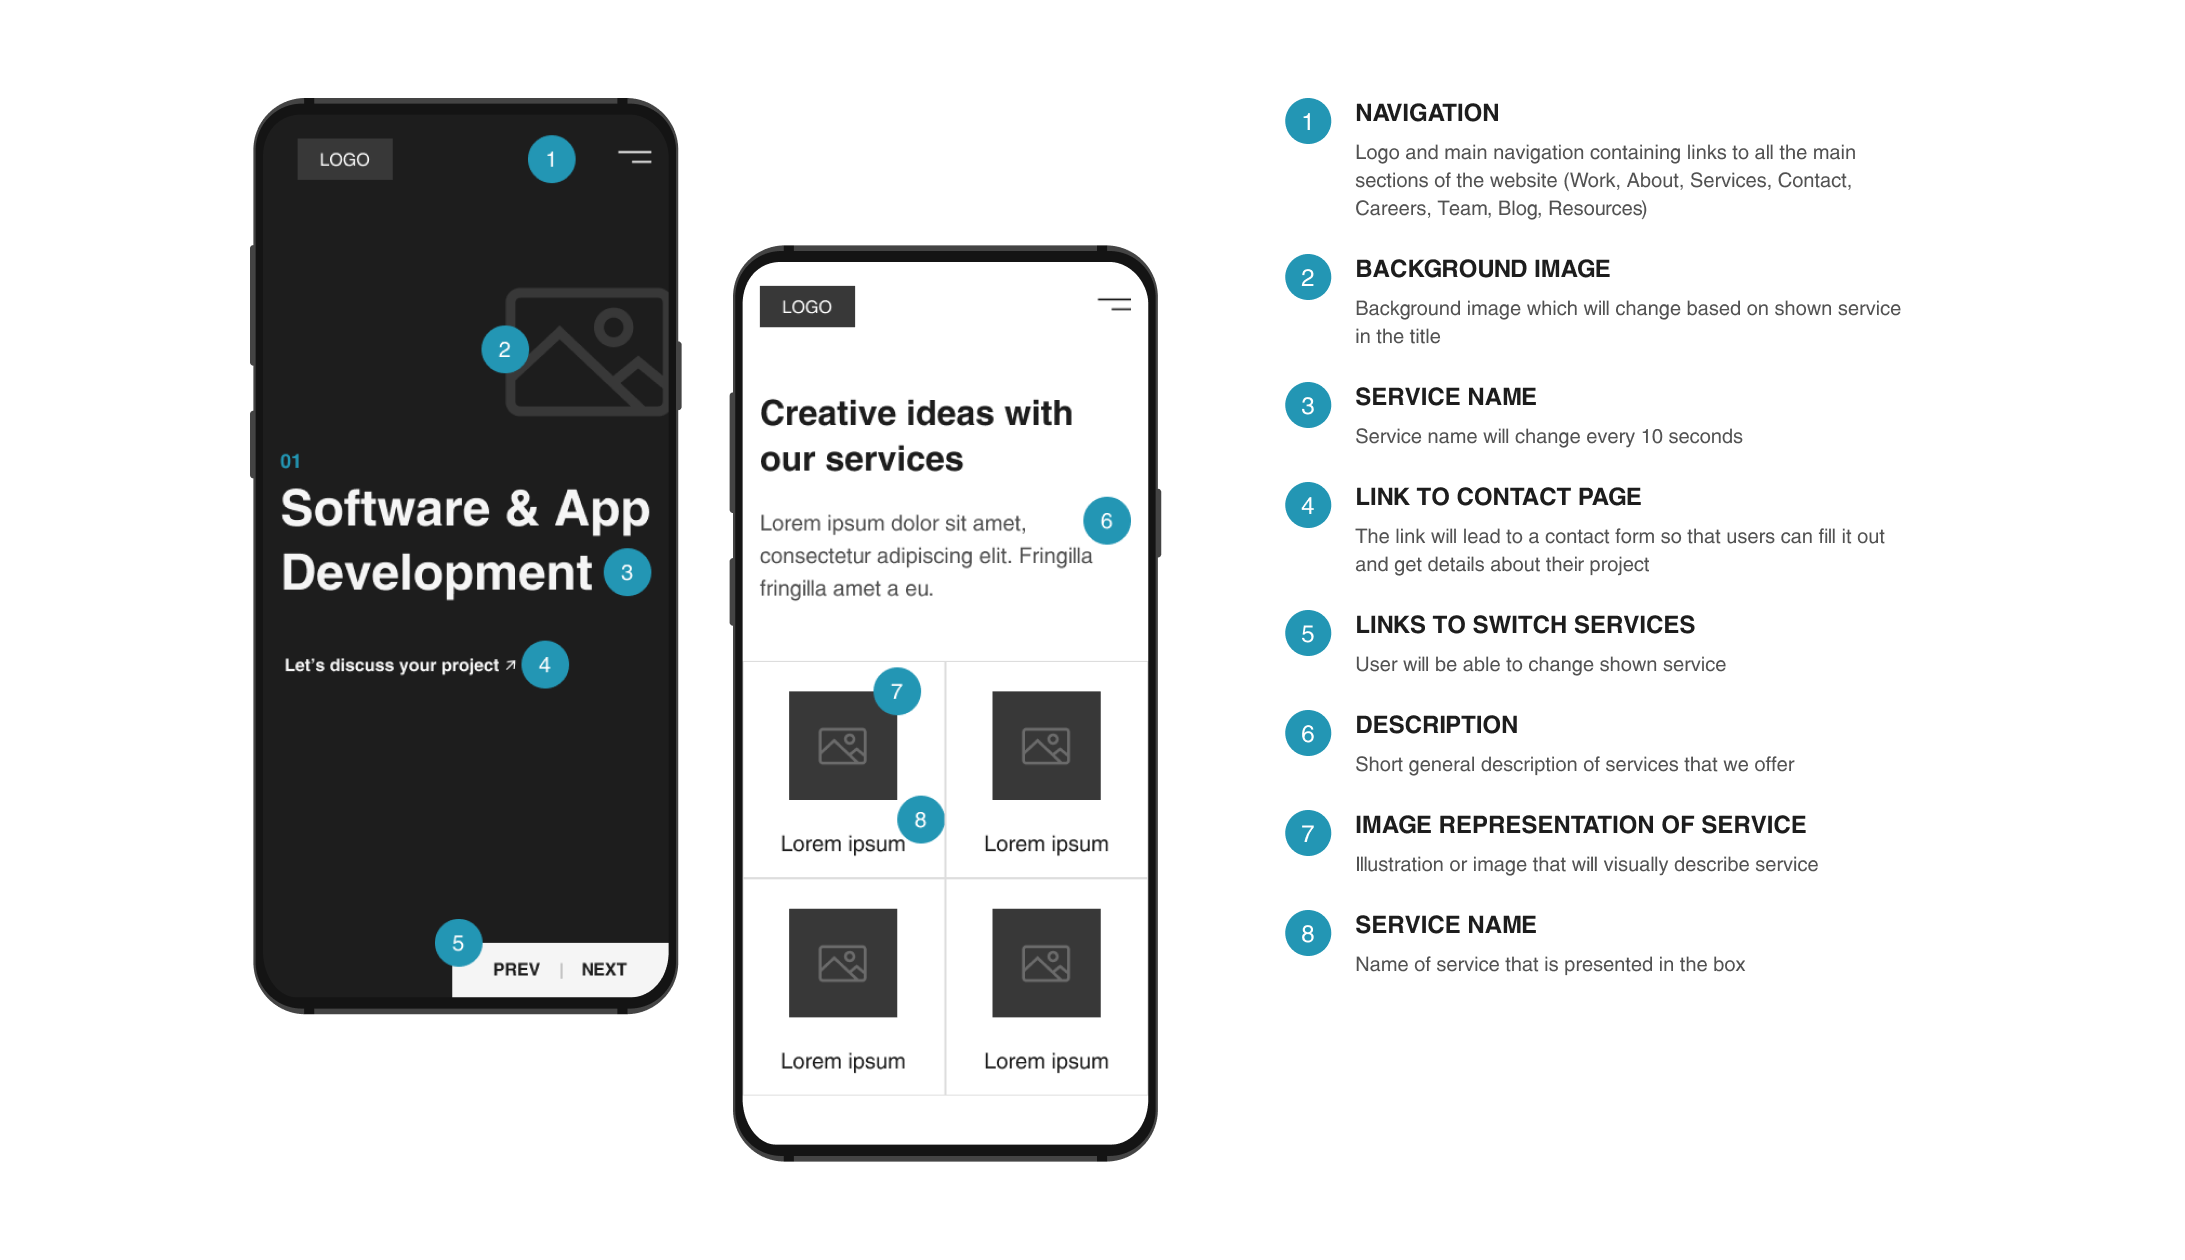
Wireframe annotations are visual notes and markings you add to your wireframes to help explain your design intentions and ideas. They can be as simple as a text label or as complex as a full-blown illustration and can be used to communicate with team members, developers, clients, or stakeholders.
Annotating your wireframes is essential to the design process because it allows you to communicate your design ideas more effectively to other team members. It also makes it easier to track changes and revisions to keep your project on track.
By adding annotations to your wireframes, you can indicate how screens should interact with each other, how text should be formatted, and where users should be able to click and tap.
Wireframe annotations can help make your wireframes more understandable and help avoid any misunderstandings during the design process.
Who are wireframe annotations for?
Annotations are an essential part of the design process used by designers and clients.
- Designers use annotations to communicate their design ideas and plans to clients, who can then provide feedback and approve or reject designs. You may also be absent from a project for a while, so you can leave a comment or annotation as a reminder of where you left off.
- Annotations can also be used to explain how a user interface works and to show how different designs would affect the user experience.
- Clients can use annotations to give design feedback, track progress, and approve or reject designs. They can also use them to provide notes on specific areas of a design that they want the designer to focus on.
- Annotations are also useful to copywriters who might want to know what to write and how to address and adapt to the target audience.
How to make wireframe annotations step-by-step

Before creating the wireframe itself, it is important to answer the following questions:
Content: What exactly will be displayed on the page?
Structure: How to arrange the elements that the page should contain?
Hierarchy: How will these elements be displayed in position, labeling, and size?
Behavior: How will these elements interact with the user?
Once you answer these questions, you can start creating a wireframe. There are two ways you can do it:
Low fidelity wireframes or sketch
Although it looks modest in black and white and doesn’t include design elements, sketching is a more attractive version of the wireframe to some. It shows the client that the creation process is in progress. This way, they can criticize and freely manipulate elements and positions.
High fidelity wireframes or digital
This type of wireframe gives a more formal and sophisticated look and goes further using some basic design elements. It shows the client the feeling of the future website layout and helps those clients who can hardly imagine the finished product with the first type of wireframe (sketch).
If you are a designer, find the tool or method that suits you best and leads you to the fastest results.
To create wireframe annotations, you’ll need wireframing and writing tools. The wireframing tool will allow you to create your wireframe, while the writing tool will allow you to add annotations and notes. Here’s a step-by-step guide on how to do it:
- Open the wireframe you want to annotate in your design software.
- Add annotation boxes to the wireframe using the drawing tools in your software.
- Type your annotations into the boxes.
- Use the formatting tools in your software to customize the appearance of your annotations.
- Save your changes and export the annotated wireframe as a PDF or PNG file.
When to create wireframe annotations
You can annotate wireframes during the design process or when all of your wireframes are complete.
Making notes as you go along and work on the design aids in thinking through how something will function. Suppose you annotate after you have completed creating all of your wireframes. In that case, you can forget how you originally intended things to function or your reasoning for making a particular choice.
A few key moments when creating annotated wireframes can be really helpful:
- First, when you’re starting a new project and need to get everyone on the same page, wireframe annotations can help you communicate your ideas effectively.
- Second, when you’re working with feedback from stakeholders or clients, wireframe annotations can help you understand and incorporate their feedback quickly and easily.
- Finally, when you’re ready to hand off your project to developers, annotated wireframes can serve as a clear and concise guide for them to follow.
What should you annotate?
So let’s assume you’ve created some wireframes. Now it’s time to annotate them. But what should you annotate?
You should annotate anything important or relevant to the user. This could include:
- Functional elements: Buttons, links, input fields, etc.
- Labels and text: Titles, headings, captions, etc.
- Layout and design: Proportions, spacing, alignment, etc.
- User feedback: Error messages, confirmations, etc.
Best practices for creating annotated wireframes

Keep annotations short
When creating annotated wireframes, it’s important to keep your annotations short. This will make it easier for your team to understand your design intent and help avoid clutter and confusion.
In addition, be sure to number your annotations so they can be easily referenced. This will also help you track which annotations correspond to which wireframes.
Annotating your wireframes is an iterative process. Be prepared to make changes and tweaks as you go. Collect feedback on your annotated wireframes and use it to make changes on the fly, improve your designs and create the best possible user experience for your users.
Write simply
Keep your annotations simple, clear, and concise. The point of annotations is to communicate your design decisions to other team members, not to write a thesis. Remember, less is more!
Number your annotations
When you’re annotating your wireframes, it’s helpful to number your annotations. This makes it easy for others to follow your feedback, understand each element, and it also makes it easier for you to keep track of what you’ve changed.
Annotate both content and functionality
When annotating your wireframes, it’s important to focus on both the content and the functionality. That means adding notes to explain what each element is and does, as well as what text and images should be included.
Annotate as you design
Annotate as you design so that you can make changes and see the effects of your annotations in real-time. This will help you make informed decisions about your design and get feedback on your annotated wireframes. You can also be sure that all your annotations are accurate, up-to-date, and easy to read and understand.
Make annotating an iterative process
When annotating your wireframes, it’s important to remember that it should be an iterative process. This means you should collect feedback on your annotations and use it to make design changes.
You can get feedback from various sources, including team members, clients, and stakeholders. But remember, not everyone will have the same opinion, so take all feedback with a grain of salt. Use it to help you improve your designs, but don’t let it hinder your progress.
Collect feedback on your annotated wireframes
Now that you’ve created your annotated wireframes, it’s time to collect feedback on them. This is a crucial step as it will help you to determine whether your annotations are clear and compelling.
There are a few ways to collect feedback on your annotated wireframe:
- Ask your team members to review them and provide feedback
- Post them online and ask for feedback from users or customers
- Use a tool like UserTesting.com to get feedback from real people
What is a good use case for wireframe annotations?
- Usability testing preparation: When conducting usability testing, wireframe annotations can outline tasks and scenarios for test participants. This helps ensure that the test accurately reflects the intended user experience.
- Visual hierarchy and flow: Annotations can indicate the visual scale of elements, such as which parts are more important or prominent. They can also outline the flow of a user’s interactions with the interface, helping stakeholders understand the user journey.
- Interactive elements: Annotations can describe how interactive elements, like buttons or drop-down menus, should function when clicked or interacted with. This is especially important for interactive prototypes.
- Responsive design guidelines: When designing for multiple screen sizes and devices, wireframe annotations can specify how elements should adapt and respond to different screen sizes, orientations, or resolutions.
- Accessibility considerations: Annotations can include notes about accessibility requirements and guidelines, ensuring the design is inclusive and compliant with accessibility standards.
Best tools for wireframe annotations
Annotated wireframes are a key part of the design process, and there are a few ways to create them.
When creating annotated wireframe, you’ll want to use a tool that allows for annotations. There are several tools for wireframe annotations, but we recommend using the most popular tools such as Balsamiq, Mockflow, or Figma. They all offer a range of features that will help you create annotated wireframes quickly and easily.
Once you’ve mastered how to create annotated wireframes with these tools, you’ll be able to use them with any wireframing software.
Better wireframe annotations
Annotations are a great way to communicate your design ideas, collaborate with team members, and get feedback. They can also help to speed up the design feedback process.
When creating annotated wireframes, keep your annotations short and to the point. Writing simply and numbering your annotations will make it easier for others to understand your designs.
Annotate both content and functionality, and make annotating an iterative process. Collect feedback on your annotated wireframes to ensure you create the most effective designs possible.
The design won’t explain itself. Use annotations to communicate the value of your design better and write them in a way that allows everyone to grasp the thinking behind your choices and decisions. Good luck!
